Blog

  • The Secret’s Out: Unveiling the Magic of Greek Lemon Potatoes

    The Secret’s Out: Unveiling the Magic of Greek Lemon Potatoes

    Dive into the world of Greek Lemon Potatoes, a captivating side dish that tantalizes taste buds with its simplicity and vibrant flavors. These Mediterranean staples boast a unique combination of creamy potatoes, tangy lemon zest and juice, and aromatic herbs, making them a perfect complement to various main courses.

    The exact origin of Greek Lemon Potatoes remains unclear, but it’s widely believed they developed in regions surrounding the Mediterranean Sea. The abundance of lemons in these areas naturally led to their incorporation into many culinary creations. Greek cuisine, known for its emphasis on fresh, seasonal ingredients, readily embraced this citrusy delight.

    Greek Lemon Potatoes are not a monolithic dish. Regional variations have emerged over time, each offering a slightly different flavor profile. This part explores the essence of the traditional Greek Lemon Potato recipe, followed by a journey through some of the most popular modern variations.

    Understanding the Key Ingredients

    The success of any dish hinges on the quality of its ingredients. Greek Lemon Potatoes are no exception. Here, we’ll unveil the secrets behind the key components that bring this dish to life:

    • The Perfect Potato:

    Not all potatoes are created equal for Greek Lemon Potatoes. Ideal varieties possess a creamy texture that readily absorbs the flavorful lemon-herb marinade. Here are some top contenders:

    Potato VarietyKey Characteristics
    Yukon GoldCreamy texture, excellent flavor absorption, holds shape well during roasting
    Maris PiperHigh starch content, fluffy interior, crisps beautifully on the outside
    DesireeSmooth texture, slightly nutty flavor, suitable for roasting and braising
    • Extra Virgin Olive Oil: The Liquid Gold

    High-quality extra virgin olive oil is the cornerstone of Mediterranean cuisine. Its rich flavor profile adds depth and richness to Greek Lemon Potatoes. Opt for a variety with a fruity or peppery aroma for an extra layer of complexity.

    • The Zest of the Citrus: Fresh Lemons

    Fresh lemons are the undisputed stars of this dish. Their bright acidity cuts through the richness of the potatoes, while the zest adds a delightful citrusy fragrance. Select firm fruits with a vibrant yellow rind for optimal flavor.

    • Aromatic Herbs and Spices: The Finishing Touches

    Dried oregano is the traditional herb used in Greek Lemon Potatoes. Its earthy aroma complements the citrus notes beautifully. However, feel free to explore other options like rosemary, thyme, or even a pinch of red pepper flakes for a touch of heat.

    Traditional Greek Lemon Potatoes: A Step-by-Step Guide

    Now that you’re familiar with the key ingredients, let’s embark on the culinary journey of creating traditional Greek Lemon Potatoes. This recipe yields a delightful side dish perfect for any occasion.
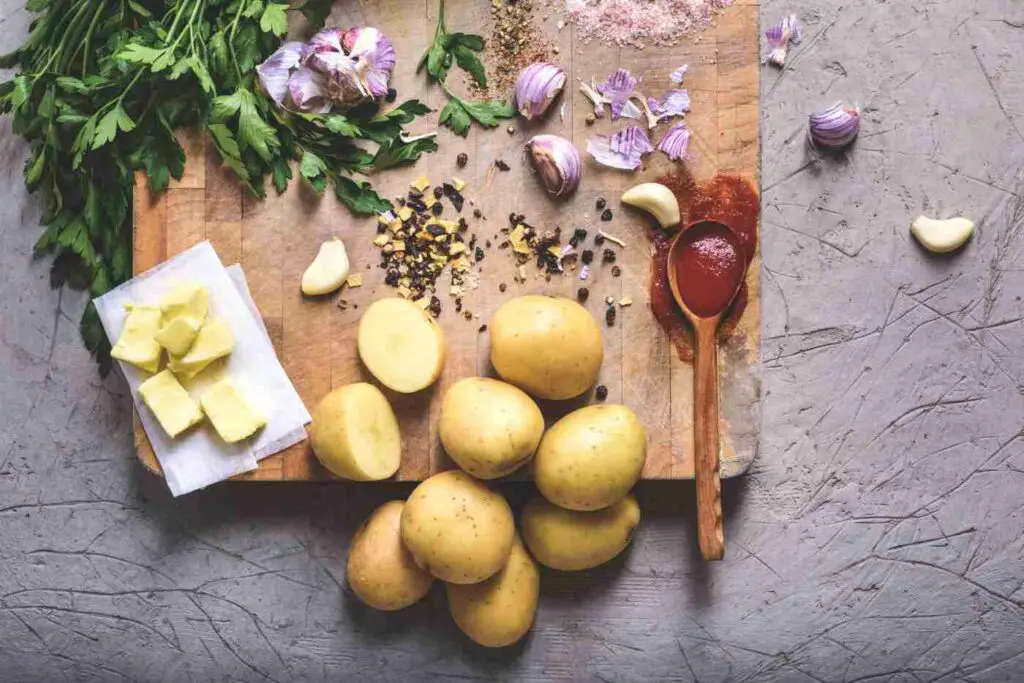
    Ingredients:

    • 2 pounds Yukon Gold potatoes or Maris Piper potatoes, scrubbed and cut into 1-inch wedges
    • ½ cup high-quality extra virgin olive oil
    • 1/3 cup freshly squeezed lemon juice (from approximately 2 lemons)
    • 2 tablespoons chopped fresh oregano
    • 2 teaspoons dried thyme (optional)
    • 1 teaspoon salt
    • 1/2 teaspoon freshly ground black pepper
    • 4 cloves garlic, minced (optional)

    Instructions:

    1. Preheat oven to 400°F (200°C). Line a baking sheet with parchment paper for easy cleanup.
    2. In a large bowl, toss the potato wedges with olive oil, lemon juice, oregano, thyme (if using), salt, and pepper. Ensure each wedge is evenly coated.
    3. Optional Step: If using garlic, add it to the bowl and toss to combine.
    4. Spread the potato wedges in a single layer on the prepared baking sheet, ensuring they are not overcrowded for optimal airflow and crispy edges.
    5. Roast for 30-40 minutes, or until the potatoes are tender on the inside and golden brown and crispy on the outside.

    Tips for Achieving Crispy Perfection:

    • High Heat is Key: A preheated oven ensures the potatoes sear quickly, locking in moisture while creating those coveted crispy edges.
    • Don’t Crowd the Pan: Overcrowding the baking sheet steams the potatoes instead of roasting them, resulting in a soggy texture. Aim for a single layer with space between each wedge.
    • The Power of Flipping: To ensure even browning and crispness, gently flip the potato wedges halfway through the roasting process.

    Modern Variations on Greek Lemon Potatoes

    The beauty of Greek Lemon Potatoes lies in their versatility. Here are some popular modern variations that add a twist to the classic recipe:

    • A Touch of Broth: For a richer flavor profile, incorporate ⅓ cup of low-sodium chicken broth into the marinade alongside the olive oil and lemon juice. This adds depth without overwhelming the natural flavors of the potatoes.
    • A Garlicky Twist: For those who crave a more pungent flavor, add 3-4 cloves of minced garlic to the marinade along with the other herbs and spices. The garlic infuses the potatoes with its characteristic aroma and adds a subtle kick.
    • Creamy Feta Delight: For a touch of indulgence, incorporate crumbled feta cheese into the dish. After roasting the potatoes for 30 minutes, remove them from the oven and sprinkle with approximately ½ cup of crumbled feta cheese. Return the pan to the oven for an additional 5-7 minutes, or until the cheese is melted and slightly golden brown.
    • A Touch of Heat: Add a pinch of red pepper flakes to the marinade for a touch of heat. This variation caters to those who enjoy a bit of spice in their side dishes.

    Plating and Serving Suggestions:

    • A Simple Elegance: Greek Lemon Potatoes are beautiful in their simplicity. Once roasted to perfection, simply transfer them to a serving platter and garnish with a sprinkle of fresh chopped parsley or dill. A drizzle of additional olive oil adds a touch of gloss and enhances the aroma.
    • A Festive Touch: For a special occasion, elevate your presentation by arranging the roasted potato wedges on a bed of fresh arugula or baby spinach. Drizzle the salad with a simple lemon vinaigrette and top it with crumbled feta cheese and a sprinkle of chopped red onion for a vibrant and flavorful side dish.

    Related:Easy Ground Beef Recipes with Few Ingredients to Try Today

    Greek Lemon Potatoes are a delightful culinary journey that transcends regions and time. This exploration has unveiled the history, key ingredients, and traditional preparation methods for this beloved dish. We’ve also delved into some popular modern variations, empowering you to personalize this recipe to suit your taste preferences. In Part 2, we’ll explore techniques for achieving crispy perfection, offer pairing suggestions for various main courses, and address frequently asked questions to equip you with all the knowledge needed to create this delectable side dish in your own kitchen.

    Tips and Techniques for Perfect Greek Lemon Potatoes

    Having explored the foundational elements of Greek Lemon Potatoes, let’s delve into the practical aspects of achieving culinary perfection. These tips and techniques will equip you to create crispy, flavorful potatoes that will elevate any meal.
    • The Importance of Preheating:

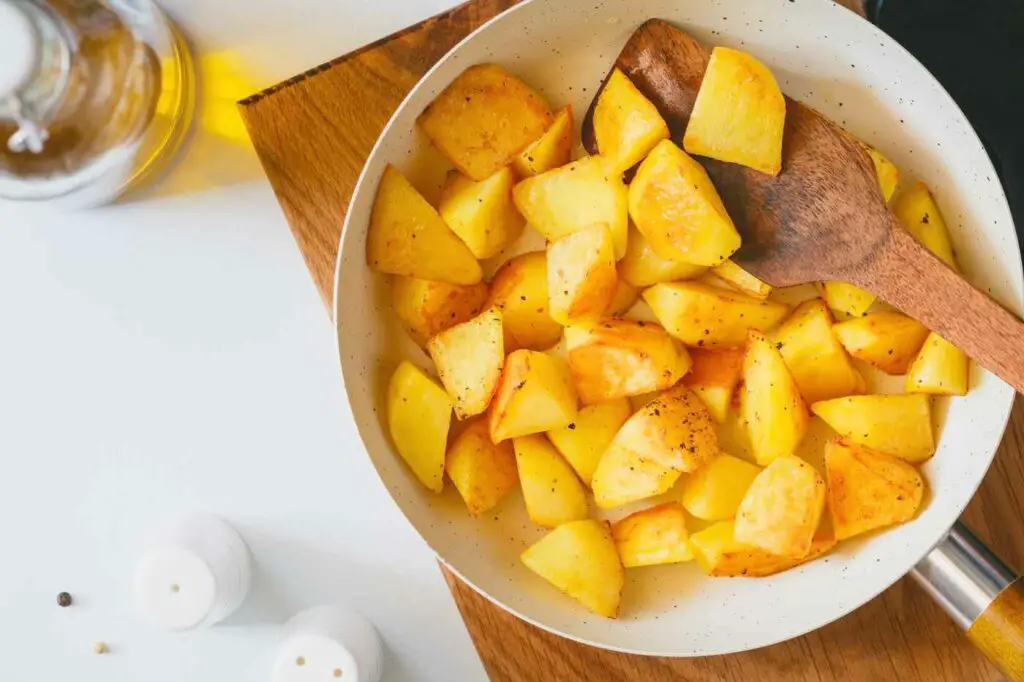
    A preheated oven is crucial for achieving crispy Greek Lemon Potatoes. When the oven reaches the desired temperature, it ensures the potatoes sear quickly upon contact with the baking sheet. This process locks in moisture while creating a golden brown, crispy exterior.

    • Maximizing Crispness: Avoiding Crowding

    Overcrowding the baking sheet with potato wedges is a recipe for disappointment. When potatoes are placed too close together, they steam instead of roast, resulting in a soggy texture. Aim for a single layer with ample space between each wedge to promote optimal airflow and crispy edges.

    • The Power of the Flip:

    For even browning and crispness throughout, don’t neglect the power of the flip. Gently use a spatula to turn the potato wedges halfway through the roasting process. This ensures all sides are exposed to the heat source, leading to a more uniform and delicious final product.

    • A Touch of Science: The Maillard Reaction

    The golden brown color and desirable flavor of Greek Lemon Potatoes are a result of the Maillard reaction. This chemical reaction occurs between amino acids and reducing sugars when exposed to high heat. Maximizing this reaction through proper preheating and avoiding overcrowding contributes to the overall success of the dish.

    Balancing Flavors: A Delicate Dance

    Greek Lemon Potatoes are a beautiful harmony of tangy citrus notes, creamy potato texture, and aromatic herbs. However, achieving this balance is key. Here’s how to adjust the taste profile to your liking:

    • Acidity from Lemons:

    Freshly squeezed lemon juice is the heart and soul of Greek Lemon Potatoes. The acidity cuts through the richness of the potatoes, adding a refreshing brightness. If you find the flavor too tart, start with a slightly lesser amount of juice and adjust to your taste preference.

    • The Salt Factor:

    Salt enhances the natural flavors of the ingredients. However, over-salting can overpower the delicate balance. Start with a teaspoon of salt and taste the potatoes after roasting for 20-25 minutes. Add more salt in small increments if needed.

    • Aromatic Herbs and Spices:

    Dried oregano is the traditional herb used in Greek Lemon Potatoes. It complements the lemon notes beautifully. Feel free to experiment with other options like rosemary, thyme, or a pinch of red pepper flakes for a touch of heat.

    Using Leftovers: Creative Inspirations

    Don’t be afraid of leftover Greek Lemon Potatoes! They can be easily transformed into delicious new creations. Here are some inspirational ideas:

    • A Frittata Fiesta: Dice leftover potatoes and incorporate them into a frittata along with your favorite vegetables and cheese. This is a perfect way to use up leftovers for a satisfying breakfast or brunch.
    • Salad Sensations: Chopped leftover Greek Lemon Potatoes add a delightful flavor and textural contrast to salads. Combine them with leafy greens, crumbled feta cheese, and a light vinaigrette for a refreshing and flavorful side dish.
    • Soup’s On!: Leftover potatoes can be pureed and incorporated into a creamy potato soup. Add a splash of chicken broth and your favorite herbs and spices for a comforting and flavorful meal.

    Serving Suggestions for Greek Lemon Potatoes

    Greek Lemon Potatoes are a versatile side dish that complements a variety of main courses. Here are some ideal pairings to consider:

    • Roasted Chicken: The classic pairing! The juicy tenderness of roasted chicken pairs beautifully with the tangy and flavorful Greek Lemon Potatoes.
    • Grilled Fish: The smoky notes of grilled fish are perfectly balanced by the bright acidity of the lemon in the potatoes.
    • Vegetarian Moussaka: This hearty vegetarian dish is elevated by the addition of Greek Lemon Potatoes. The creamy texture of the moussaka complements the crispy potatoes for a well-rounded meal.

    Greek Lemon Potatoes are a timeless culinary treasure. With their simplicity, flavorful profile, and versatility, they are a welcome addition to any table. This comprehensive guide has equipped you with the knowledge and techniques to create this delightful dish in your own kitchen. So, preheat your oven, gather your ingredients, and embark on a journey to Greek Lemon Potato perfection!

  • Is Rice Krispie Treats Cereal Healthy? Your Breakfast Questions Answered!

    Is Rice Krispie Treats Cereal Healthy? Your Breakfast Questions Answered!

    For generations, the snap, crackle, pop of Rice Krispies® cereal has been a familiar sound in kitchens across the globe. But what if the beloved Rice Krispie Treats® bar, a childhood favorite for many, could be enjoyed in a convenient and breakfast-friendly format? Enter Rice Krispie Treats Cereal, a delightful innovation that brings the nostalgia and taste of the iconic treat to your morning bowl.

    This section will delve into the history of Rice Krispie Treats Cereal, exploring its origins and how it became a reality for cereal lovers everywhere.

    What is Rice Krispie Treats Cereal?

    Description

    Rice Krispie Treats Cereal is a breakfast cereal that captures the essence of the classic Rice Krispie Treats® bar. It features puffed rice cereal pieces, similar to those found in the original Rice Krispies® cereal, coated in a sweet and marshmallow-flavored shell. This creates a delightful combination of textures: the satisfying crunch of the cereal paired with the soft and slightly chewy marshmallow coating.

    Rice Krispie Treats Cereal offers a familiar and comforting taste, reminiscent of the after-school snack or birthday party treat many grew up enjoying (passive voice).

    Ingredients and Nutritional Information

    The core ingredients of Rice Krispie Treats Cereal are:

    • Puffed rice cereal: The base of the cereal, providing a light and crispy texture.
    • Marshmallow flavoring: Creates the signature sweet and marshmallowy taste.
    • Sugar: Adds sweetness and helps bind the ingredients together.

    Rice Krispie Treats Cereal may also contain additional ingredients such as vitamins, minerals, and whole grains (depending on the specific variety). It’s important to check the nutrition label for details on sugar content, fat content, and any potential allergens (passive voice).

    Table 1: Sample Nutritional Information for Rice Krispie Treats Cereal (per serving)

    NutrientAmount% Daily Value
    Calories1306%
    Total Fat1g2%
    Saturated Fat0.5g3%
    Sodium130mg5%
    Total Carbohydrates28g9%
    Sugars12g13%
    Protein1g2%

    Please note: This is a sample table and actual nutritional information may vary depending on the specific brand or variety of Rice Krispie Treats Cereal.

    How to Eat Rice Krispie Treats Cereal

    A. Traditional Milk and Cereal

    The most common way to enjoy Rice krispie treats cerealis the classic milk and cereal routine. The cold milk helps to complement the sweetness of the cereal and creates a delightful textural contrast between the crispy cereal and the smooth milk.

    • Choose your favorite type of milk: whole milk, skim milk, almond milk, oat milk, etc.
    • Pour the desired amount of Rice Krispie Treats Cereal into a bowl.
    • Add your preferred amount of milk.
    • Enjoy the familiar snap, crackle, pop as the cereal interacts with the milk (passive voice).

    B. Creative Consumption Ideas

    Rice Krispie Treats Cereal can also be enjoyed beyond the traditional bowl of milk. Here are a few ideas to inspire your creativity:

    • Add fresh or frozen fruit for a burst of flavor and additional vitamins.
    • Sprinkle on chopped nuts or seeds for a touch of protein and healthy fats.
    • Use the cereal as a topping for yogurt or parfaits.
    • Crush the cereal and mix it into homemade granola bars for an extra marshmallowy twist.

    Benefits of Rice Krispie Treats Cereal

    A. Convenient and Quick Breakfast Option

    Rice Krispie Treats Cereal is a perfect choice for busy mornings. It requires minimal preparation, making it ideal for those on the go (passive voice). Simply pour the cereal into a bowl, add milk, and you’re ready to enjoy a delicious and satisfying breakfast.

    • No cooking required – Saves valuable time in the morning routine (passive voice).
    • Easy for children to prepare themselves, promoting independence (passive voice).
    • Convenient for packing in lunchboxes or for quick on-the-go snacks.

    B. Potential Source of Nutrients

    Rice krispie treats cereal can be a source of important nutrients depending on the specific variety. While it’s important to be mindful of sugar content (addressed in next section), some varieties may be fortified with:

    • Vitamins and minerals: Vitamin D for bone health, iron for energy production, etc.
    • Whole grains: Can provide additional fiber for digestive health.

    Table 2: Sample Fortified Vitamins and Minerals in Rice Krispie Treats Cereal

    Vitamin/MineralPotential Benefits
    Vitamin DSupports bone health and immune function
    IronHelps carry oxygen in the blood
    CalciumImportant for strong bones and teeth

    Always check the nutrition label to understand the specific nutrient profile of the chosen variety.

    C. Fun and Familiar for Kids

    The connection to the beloved Rice Krispie Treats® bar makes this cereal a fun and familiar option for children. The playful taste and texture can encourage them to enjoy a more balanced breakfast compared to sugary cereals.

    Rice Krispie Treats Cereal vs. Homemade Rice Krispie Treats

    A. Similarities in Taste and Texture

    Rice krispie treat cereal offers a taste and texture profile that closely resembles the classic homemade Rice Krispie Treats® bar. The puffed rice cereal base provides the same satisfying crunch, while the marshmallow-flavored coating delivers a familiar sweetness (passive voice). This allows children and adults alike to enjoy the essence of the treat in a convenient breakfast format.

    B. Convenience vs. Customization

    One of the biggest advantages of Rice Krispie Treat Cereal is its convenience. It requires no preparation time, making it ideal for busy mornings (passive voice). However, homemade Rice Krispie Treats® bars offer greater control over ingredients. You can adjust the amount of sugar, add different flavors (chocolate chips, sprinkles, etc.), or use alternative ingredients like brown rice krispies for a more whole-grain option.

    C. Nutritional Considerations

    It’s important to consider the nutritional content of both rice krispie treats cereal and homemade Rice Krispie Treat® bars. The cereal may have a lower sugar content compared to some homemade variations, depending on the recipe used. However, it’s still crucial to check the nutrition label for both Ideally, Rice krispie treats should be part of a balanced breakfast routine that includes other healthy options like fruits, vegetables, and protein sources.

    Table 3: Sample Sugar Content Comparison (per serving)

    OptionSugar Content
    Rice Krispie Treats Cereal (average)12g
    Homemade Rice Krispie Treats® bars (depending on recipe)Can vary widely, potentially exceeding 20g

    Please note: This is a sample table and actual sugar content may vary depending on the specific brand or variety of Rice Krispie Treats and the homemade recipe used.

    Rice Krispie Treats Cereal offers a delightful way to enjoy the taste of the iconic

    Rice Krispie Treat® bar in a convenient and breakfast-friendly format. It provides a satisfying crunch with a familiar marshmallowy flavor, potentially contributing to a balanced breakfast routine when enjoyed alongside other healthy options (passive voice). Whether you’re seeking a quick and easy breakfast or a nostalgic treat, Rice Krispie Treats offers a fun and flavorful option for the whole family.

  • Irish Brown Bread: Bake This Delicious Loaf at Home! 

    Irish Brown Bread: Bake This Delicious Loaf at Home! 

    Ireland’s culinary landscape boasts a wealth of delectable dishes, and nestled amongst them is the iconic Irish Brown Bread. This dense, nutty flavored bread, a cornerstone of Irish cuisine for centuries, has captivated taste buds and sustained communities throughout history. Irish Brown Bread is more than just a source of sustenance; it’s a symbol of resilience and a testament to the ingenuity of Irish people.

    • Key Facts about Irish Brown Bread:
    FactDescription
    HistoryEnjoyed for centuries in Ireland
    SignificanceStaple food and symbol of Irish heritage
    CharacteristicsDense texture, nutty flavor, versatile

    Unveiling the Essence of Irish Brown Bread

    A. Key Ingredients

    The soul of Irish Brown Bread lies in its simple yet powerful combination of ingredients:

    • Whole Wheat Flour: The foundation of this bread is whole wheat flour, providing a robust texture and a dose of whole grains. This flour is a rich source of fiber, vitamins, and minerals, contributing to the nutritional value of the bread.
    • Buttermilk: Buttermilk, a fermented milk product, adds a delightful tanginess to the bread and activates the baking soda, a crucial leavening agent. Its acidity also helps tenderize the gluten in the flour, resulting in a slightly softer crumb.
    • Baking Soda: In contrast to breads that rely on yeast for rising, irish brown bread recipeutilizes baking soda as its leavening agent. When combined with the acidic buttermilk, a chemical reaction is triggered, causing the dough to rise.
    • Molasses: A touch of sweetness and depth of flavor is introduced by molasses. This dark syrup, a byproduct of sugar refining, adds a characteristic hint of caramel and enhances the bread’s richness.
    • Rolled Oats (Optional): For an extra textural dimension and a boost of fiber, rolled oats can be incorporated into the dough. These flattened oat groats add a delightful chewiness and a subtle oat flavor.

    Table: Nutritional Value of Irish Brown Bread (per slice)

    NutrientAmount
    Calories160
    Carbohydrates30g
    Fiber3g
    Protein5g
    Fat2g

    B. The Science Behind the Soda Bread

    Unlike many breads that rely on the biological process of yeast fermentation for rising, irish brown bread recipe takes a different approach. It utilizes a chemical reaction between baking soda and the acidic buttermilk to achieve leavening. When these two ingredients come together, carbon dioxide gas is released, causing the dough to rise and creating a dense yet airy crumb.

    Step-by-Step Guide to Baking Irish Brown Bread

    The process of baking irish brown bread recipe is relatively straightforward, making it accessible to bakers of all experience levels. Here’s a glimpse into the steps involved:

    A. Gathering the Ingredients

    To embark on your Irish Brown Bread baking journey, you’ll need:

    • Whole wheat flour
    • Baking soda
    • Salt
    • Buttermilk
    • Molasses
    • Rolled oats (optional)

    Table: Ingredients for Irish Brown Bread

    IngredientQuantity
    Whole wheat flour3 cups
    Baking soda2 teaspoons
    Salt1 teaspoon
    Buttermilk1 1/2 cups
    Molasses1/4 cup
    Rolled oats (optional)1/2 cup

    B. Mixing the Dough

    1. In a large bowl, whisk together the dry ingredients: whole wheat flour, baking soda, and salt.
    2. Create a well in the center of the dry ingredients.
    3. Pour in the buttermilk and molasses. Using a wooden spoon or your hands, gently combine the wet and dry ingredients until a shaggy dough forms.

    C. Shaping and Baking

    1. On a lightly floured surface, turn out the dough and knead it briefly, just until it comes together. Avoid overkneading, as this can result in a tough loaf.
    2. Gently shape the dough into a round loaf. Optional: Dust the top of the loaf with a sprinkle of rolled oats for a decorative touch.
    3. Transfer the shaped dough to a greased baking sheet.
    4. Using a sharp knife, score a deep X or + on the top of the loaf. This allows steam to escape during baking and creates a more even rise.
    5. Preheat your oven to 425°F (220°C).
    6. Bake the Irish Brown Bread for 40-45 minutes, or until the internal temperature reaches 200°F (93°C). A gentle tap on the bottom of the loaf should produce a hollow sound.
    7. Remove the bread from the oven and let it cool completely on a wire rack before slicing and serving.

    Tips:

    • For a crispier crust, preheat your baking sheet in the oven while it preheats.
    • You can also brush the top of the dough with a bit of milk or buttermilk before baking for a golden brown finish.
    • To ensure even baking, rotate the pan halfway through the baking time.

    Enjoying Your Freshly Baked Irish Brown Bread:

    Once your Irish Brown Bread has cooled completely, slice it and savor its unique flavor and texture. Here are some delicious ways to enjoy it:

    • Simple and Satisfying: Toasted with butter and a touch of jam for a classic breakfast or afternoon snack.
    • A Hearty Pairing: Alongside a bowl of steaming soup or stew, where the bread’s dense crumb can soak up all the delicious flavors.
    • A Modern Twist: Toasted and topped with avocado, a poached egg, and a sprinkle of sea salt for a trendy and satisfying brunch option.

    The versatility of Irish Brown Bread allows it to be enjoyed in countless ways. Experiment with different toppings and accompaniments to discover your own favorite combinations.

    Related : Chocolate Banana Bread: Beyond Basic Banana, Next-Level Bread


    Additional Information about Irish Brown Bread

    • Variations:Irish Brown Bread serves as a blank canvas for creativity. Here are a few popular variations:
      • Sweet additions: Raisins, currants, chopped dried fruits, or honey can be incorporated for a touch of sweetness.
      • Nutty twist: For extra texture and protein, consider adding chopped walnuts, pecans, or almonds.
      • Boozy twist: Substitute some of the buttermilk with Guinness or stout beer for a unique malty flavor.
    • Health Benefits: Beyond its delicious taste, Irish Brown Bread boasts some health benefits:
      • Whole grains: The use of whole wheat flour provides a good source of fiber, aiding digestion and promoting gut health.
      • Lower fat content: Compared to some other breads, Irish Brown Bread is generally lower in fat, making it a more heart-friendly option.
      • Rich in nutrients: Whole wheat flour contributes essential vitamins and minerals, including B vitamins, iron, and magnesium.

    Remember: The beauty of irish brown soda bread lies in its simplicity and versatility. So, preheat your oven, gather your ingredients, and embark on a baking journey that celebrates Irish heritage and culinary tradition.

    Storing and Reheating: Preserving Freshness

    A. Proper Storage

    To ensure your Irish Brown Bread remains fresh and flavorful, proper storage is key. Once baked, allow the bread to cool completely on a wire rack. This allows moisture to escape and prevents the bread from becoming soggy.

    B. Reheating for Optimal Flavor

    While irish brown soda bread is delicious fresh, reheating can enhance its texture and flavor profile. Here are some tips:

    • Individual slices can be reheated in the oven or toaster oven for a few minutes until warmed through. This method results in a slightly crispy crust and a soft, chewy center.
    • For a more uniform reheating experience, wrap the entire loaf loosely in aluminum foil and place it in a preheated oven at 350°F (175°C) for 10-15 minutes. This reheating method ensures the bread warms evenly without drying out.

    Tip: Sprinkling the bread with a little water before reheating can help revive any dryness and restore a fresher texture.

    A Look Back and Forward: The Legacy of Irish Brown Bread

    A. A Staple Throughout History

    Irish brown soda bread has been a staple food in Irish culture for centuries. Simple to make using readily available ingredients, it served as a source of sustenance during times of hardship. Its dense and hearty nature provided essential nourishment for farmers, laborers, and families throughout Ireland’s history.

    B. A Modern-Day Delight

    irish brown soda bread remains a popular bread choice today, not just in Ireland but around the world. Bakers appreciate its simplicity and versatility, while consumers enjoy its unique flavor and nutritional benefits. The rise of artisanal baking has also seen a renewed interest in Irish Brown , with bakers experimenting with new flavor variations and techniques.

    More than just a loaf of bread, irish brown soda bread is a symbol of Irish heritage, resilience, and culinary tradition. Its enduring popularity is a testament to its deliciousness and adaptability. So, bake a loaf, savor its flavor, and connect with a piece of Irish history.

  • Easy Ground Beef Recipes with Few Ingredients to Try Today

    Do weeknights leave you scrambling for easy ground beef recipes with few ingredients? You’re not alone! Between work, errands, and family commitments, whipping up a delicious and satisfying meal can feel like a mission impossible. But fear not, busy home cooks! Ground beef is your secret weapon for conquering those chaotic evenings.

    This versatile protein is a champion of convenience and affordability. It’s readily available, cooks quickly, and requires minimal prep work. But ground beef isn’t just about burgers and basic fare. With a few simple ingredients and a touch of creativity, you can transform it into a symphony of flavors, exploring cuisines from around the world or crafting comforting classics your family will love.

    This ultimate guide unlocks the potential of easy ground beef recipes with few ingredients. We’ll show you how to create mouthwatering meals in no time, leaving you more time to relax and enjoy quality time with loved ones. From 5-ingredient wonders to global ground beef twists, get ready to revolutionize your weeknight dinners!

    The Solution: The Power of Ground Beef

    Enter the humble ground beef. This versatile and affordable protein is a weeknight dinner hero. It’s readily available in most grocery stores, comes in various leanness options to suit dietary needs, and requires minimal preparation time. With ground beef as your base, you can create a wide variety of flavorful and satisfying dishes that the whole family will enjoy.

    Table 1: Benefits of Using Ground Beef for Weeknight Dinners

    BenefitDescription
    AffordabilityGround beef is generally a budget-friendly protein option.
    VersatilityIt can be used in countless recipes, from classic burgers to ethnic dishes and casseroles.
    Minimal Prep TimeGround beef browns quickly and requires minimal chopping or preparation.
    Kid-FriendlyMany ground beef dishes are naturally appealing to children.
    Meal Prep PotentialLeftovers can be easily repurposed into other meals.

    Overview of Easy Ground Beef Recipes with Few Ingredients

    This guide is designed to be your one-stop shop for whipping up delicious ground beef meals with minimal effort. We’ll focus on recipes that require 5 ingredients or less, making them perfect for busy weeknights. You’ll find a variety of options to suit different tastes and dietary preferences, including:

    • Classic Comfort Food: Think juicy burgers, hearty chili, and cheesy casseroles.
    • Global Flavors: Explore the world with recipes like Korean Beef Bowls and Tex-Mex Sloppy Joes.
    • Healthy Twists: Discover ways to incorporate vegetables and lean ground beef into nutritious meals.

    Whether you’re a seasoned cook or just starting out in the kitchen, these recipes will equip you with the tools to create quick and flavorful meals that don’t require hours of prep time. So, ditch the takeout menus and embrace the convenience and deliciousness of ground beef!

    Recipe Ideas Beyond 5 Ingredients

    While 5-ingredient recipes are a lifesaver on busy nights, there’s a whole world of possibilities waiting to be explored with ground beef. Here are some ideas to take your ground beef meals to the next level:

    A. One-Pan Wonders: Sheet Pan Dinners and Skillet Meals

    These recipes are all about convenience and minimal cleanup. Simply toss together your ingredients on a sheet pan or in a skillet, and let the oven or stovetop do the work.

    • Examples:
      • Beef and Veggie Sheet Pan Dinner: Combine ground beef with chopped vegetables like broccoli, bell peppers, and onions. Drizzle with olive oil, season with your favorite spices, and roast until cooked through.
      • Cheesy Ground Beef Skillet with Rice: Brown ground beef with chopped onions and garlic. Stir in rice, diced tomatoes, and your favorite broth. Top with shredded cheese and bake until the rice is cooked through and the cheese is melted.

    B. Global Flavors: Easy International Ground Beef Dishes

    Ground beef isn’t limited to just burgers and American classics. Here are some ideas to add international flair to your weeknight meals:

    • Korean Beef Bowls: Marinated ground beef is cooked with a flavorful sauce of soy sauce, brown sugar, ginger, and garlic. Served over rice with kimchi and a fried egg for a complete and satisfying meal.

    • Sloppy Joes with a Tex-Mex Twist: Spice up classic Sloppy Joes by adding ingredients like black beans, corn, diced tomatoes, and chili powder. Serve on hamburger buns with your favorite toppings like avocado slices, sour cream, and salsa.

    Table 2: International Ground Beef Recipe Inspiration

    CuisineDish Ideas
    AsianKorean Beef Bowls, Mongolian Beef Stir-fry
    MexicanTex-Mex Sloppy Joes, Beef Enchiladas
    ItalianBeef Lasagna, Shepherd’s Pie (Ground Lamb can be substituted)
    Middle EasternBeef Kibbeh (made with bulgur wheat)**

    C. Dietary Considerations: Adapting Ground Beef Recipes

    Love ground beef but have specific dietary needs? No problem! Here are some tips for adapting recipes:

    • Low-Carb: Substitute cauliflower rice or spiralized vegetables for pasta or rice in casseroles and skillets.
    • Gluten-Free: Choose gluten-free pasta buns or wraps to enjoy your favorite ground beef dishes.
    • Dairy-Free: Opt for plant-based cheese alternatives in casseroles and lasagna. Many store-bought taco cheese sauces are also dairy-free.

    Remember: These are just a few starting points. Feel free to experiment with different ingredients and flavors to create your own signature ground beef dishes. With a little creativity, you can turn this versatile protein into a delicious and satisfying meal for any occasion.

    FAQs: Easy Ground Beef Recipes with Few Ingredients

    This FAQ section addresses some common questions you might have about using ground beef in quick and easy meals:

    Can I use ground turkey instead of ground beef?

    Yes! Ground turkey is a healthy substitute. It’s leaner and may require slightly different seasonings.

    How can I make my ground beef meals more nutritious?

    • Add chopped vegetables like onions, peppers, or zucchini for vitamins, fiber, and texture.
    • Serve with whole grains like brown rice or quinoa for complex carbohydrates.
    • Choose lean ground beef (90% lean or higher) and drain excess fat while cooking.

    What are some other ways to use leftover ground beef?

    Don’t toss it! Repurpose leftovers into:

    • Stuffed peppers, tacos, or breakfast scrambles
    • Soups, stews, or chili for added heartiness
    • Sliders or mini meatloaves (form and cook)

    Explore the recipe ideas in this guide to make ground beef a versatile and nutritious weeknight staple!

    Ground beef is more than just burgers! This guide showcased its potential for creating a world of delicious and easy ground beef recipes with few ingredients.

    Recap the Benefits:

    • Budget-friendly: Ground beef is a cost-effective protein option.
    • Versatility Unbound: Transform it into countless dishes, from comfort food to global flavors and healthy choices.
    • Minimal Prep Time: Quick browning and minimal prep make it ideal for busy weeknights.
    • Family-Approved: Many ground beef meals are naturally kid-pleasing.
    • Meal Prep Potential: Leftovers easily become new meals, minimizing waste.

    Embrace Creativity: Experiment with flavors and ingredients! This guide is a foundation, explore spices, herbs, and vegetables to personalize your ground beef meals.

    The Satisfaction Factor: Cooking at home lets you control ingredients and create meals tailored to your family. Witnessing their joy as they savor a delicious and nutritious meal is a reward.

    So, the next time weeknight dinner woes arise, remember the power of ground beef. With a little planning and inspiration, this versatile protein becomes a delicious and satisfying meal for the whole family. Now go forth and conquer those weeknights!

  • The Secret to Perfect Pumpkin Cupcakes with Cream Cheese Frosting (Easy Recipe!)

    The Secret to Perfect Pumpkin Cupcakes with Cream Cheese Frosting (Easy Recipe!)

    As the crisp autumn air sweeps in and leaves begin to change their vibrant hues, our taste buds crave the comforting flavors of fall. Among the many seasonal delights, pumpkin cupcakes with cream cheese frosting reign supreme. These moist and flavorful cupcakes, bursting with the essence of pumpkin spice, are a guaranteed crowd-pleaser. This comprehensive guide empowers you to bake perfect pumpkin cupcakes from scratch, complete with a decadent cream cheese frosting.

    Imagine the warm aroma of pumpkin spice wafting through your kitchen, enticing everyone with its promise of fall flavors. Homemade pumpkin cupcakes topped with dreamy cream cheese frosting are not just a dessert – they’re a delightful experience. This detailed guide unveils the secrets to baking these autumnal treats, allowing you to create irresistible cupcakes that are sure to become a cherished tradition.

    Pumpkin Cupcake Magic: The Base

    The foundation of these delectable cupcakes lies in a perfectly balanced batter. Let’s delve into the essential ingredients and the step-by-step process to achieve bakery-worthy results.

    A. Ingredients Breakdown

    • All-purpose flour: The base of the cupcake structure, providing stability and rise. Gluten-free alternatives like almond flour or oat flour can be used for dietary restrictions.
    • Baking powder & baking soda: Leavening agents that help the cupcakes rise for a light and fluffy texture.
    • Spices: Ground cinnamon, ginger, nutmeg, and cloves are the quintessential elements of pumpkin pie spice. These warm spices infuse the cupcakes with the essence of fall. Pre-made pumpkin pie spice can also be used for convenience.
    • Oil or butter: Vegetable oil creates a moist and tender crumb, while melted butter adds richness and a slightly denser texture. The choice depends on your desired outcome.
    • Sugar: A combination of granulated sugar and brown sugar provides sweetness, structure, and moisture to the cupcakes. Brown sugar adds a hint of caramel flavor as well.
    • Eggs: Binds the ingredients together and contributes to the rise of the cupcakes.
    • Vanilla extract: Enhances the overall flavor profile with its warm and inviting aroma.
    • Pumpkin puree: The star ingredient! Canned pumpkin puree is readily available and works perfectly in this recipe. Ensure it’s pure pumpkin puree, not pumpkin pie filling.

    Table 1: Pumpkin Cupcake Ingredients – Functions

    IngredientFunction
    All-purpose flourStructure, rise
    Baking powder & baking sodaLeavening
    Spices (cinnamon, ginger, nutmeg, cloves)Flavor (pumpkin pie spice)
    Oil or butterMoisture, texture
    Sugar (granulated & brown)Sweetness, structure, moisture
    EggsBinding, rise
    Vanilla extractFlavor
    Pumpkin pureePumpkin flavor, moisture

    B. Step-by-Step Guide

    1. Preheat the oven: Set your oven to the temperature specified in the recipe (typically around 350°F/175°C). This ensures the cupcakes bake evenly.
    1. Prepare cupcake liners: Line a muffin pan with paper cupcake liners. This prevents the cupcakes from sticking to the pan and allows for easy removal.

    Pro Tip: For a professional touch, use colorful or patterned cupcake liners to add a festive flair.

    1. Dry Ingredients: In a large bowl, whisk together the all-purpose flour, baking powder, baking soda, and spices. This aerates the dry ingredients and ensures even distribution throughout the batter.
    1. Wet Ingredients: In a separate bowl, cream together the oil/butter, sugar, eggs, and vanilla extract. Using an electric mixer on medium speed for a few minutes is recommended for a smooth and creamy mixture.
    2. Combine Wet & Dry: Gradually add the wet ingredients to the dry ingredients, mixing until just combined. Overmixing can lead to tough cupcakes.
    1. Fold in Pumpkin Puree: Gently fold the pumpkin puree into the wet and dry ingredient mixture using a rubber spatula. Avoid overmixing – a few streaks of pumpkin puree are perfectly acceptable.Overmixing can result in a dense and tough crumb.

    Related : Nestle Toll House Cookies: Easy Recipe, Tips & Variations

    Tips:

    1. Don’t overmix! Once the dry ingredients are just incorporated, stop mixing. Overmixing develops the gluten in the flour, leading to tough cupcakes.
    2. Scrape down the sides of the bowl: Ensure all ingredients are evenly combined by scraping down the sides of the bowl with a rubber spatula before each fold.
    1. Fill Cupcake Liners: Portion the batter evenly among the prepared cupcake liners. A standard ice cream scoop can be used for easy and mess-free filling. Ideally, fill the liners to about two-thirds full.

    Tip: Use a kitchen scale for ultimate accuracy in portioning the batter for consistent cupcake sizes.

    1. Bake!: Place the cupcake pan in the preheated oven and bake for the time specified in the recipe (typically around 20-25 minutes). A toothpick inserted into the center of a cupcake should come out clean when the cupcakes are done.
    2. Cooling: Once baked, remove the cupcakes from the oven and let them cool completely on a wire rack before frosting. This prevents the frosting from melting and allows the cupcakes to set properly.
    1. Troubleshooting: If the cupcakes are not rising properly, ensure you used the correct amount of baking powder and baking soda. Additionally, avoid overmixing the batter.

    Sweet Dreams: The Cream Cheese Frosting

    The decadent cream cheese frosting is the crowning glory of these pumpkin cupcakes. This luscious frosting adds a delightful layer of sweetness and tanginess, creating the perfect flavor contrast with the spiced pumpkin base.

    A Ingredients Spotlight

    The magic of this frosting lies in a few key ingredients:

    • Cream cheese: The star of the show! Use full-fat cream cheese at room temperature for the best texture and spreadability. Softened cream cheese is essential to avoid lumps in the frosting.
    • Butter: Softened butter creates a smooth and creamy frosting base.
    • Powdered sugar: Sweetens the frosting and provides a light and fluffy texture.
    • Vanilla extract: Enhances the overall flavor profile.
    • Salt: A pinch of salt balances the sweetness of the frosting and elevates the other flavors.

    Tip: For a richer frosting, use brown sugar instead of a portion of the powdered sugar.

    The Whipping Process

    Here’s a step-by-step guide to achieving dreamy cream cheese frosting:

    1. Soften the Cream Cheese: This is crucial! Leave the cream cheese at room temperature for at least an hour before using. Cold cream cheese will result in a lumpy frosting.
    2. Cream the Butter and Cheese: In a large bowl, using an electric mixer on medium speed, cream together the softened butter and cream cheese until light and fluffy. This takes about 2-3 minutes.
    3. Gradual Sugar Addition: Gradually add the powdered sugar to the creamed butter and cheese mixture, one cup at a time, on low speed. This helps to prevent a sugar cloud from forming.
    4. Vanilla & Salt: Once all the powdered sugar is incorporated, mix in the vanilla extract and a pinch of salt. Beat until smooth and creamy.

    Tips:

    • Sift the powdered sugar before adding it to the frosting. This removes any lumps and ensures a smooth texture.
    • If the frosting seems too thick, add a tablespoon of milk or heavy cream at a time until you reach the desired consistency.
    • Conversely, if the frosting is too thin, add more powdered sugar, one tablespoon at a time, until it reaches a spreadable consistency.

    Decorating Delights

    Now comes the fun part – decorating your cupcakes! The dreamy cream cheese frosting offers a versatile canvas for your creativity. Here are some ideas:

    • Classic Swirl: Use a piping bag fitted with a Wilton 1M decorating tip to create a classic swirl on top of each cupcake.
    • Festive Sprinkles: Top your frosted cupcakes with a sprinkle of fall-themed sprinkles, chopped nuts, or candied ginger for a festive touch.
    • Piped Designs: For a more intricate look, use different piping tips to create borders, rosettes, or other decorative designs.

    Assembling and Serving Perfection

    Once your cupcakes are completely cool and your frosting is ready, it’s time to assemble these delightful treats!

    1. Frosting the Cupcakes: Spread or pipe the cream cheese frosting onto the cooled cupcakes.
    2. Storing: Frosted cupcakes can be stored in an airtight container at room temperature for up to 2 days. For longer storage, they can be refrigerated for up to a week.

    Tip: Frosted cupcakes can also be frozen for up to 3 months. Thaw them overnight in the refrigerator before serving.

    Pumpkin Spice and Everything Nice: Variations

    Don’t be afraid to experiment and personalize your pumpkin cupcakes! Here are some delightful variations to explore:

    A. Spiced Up Variations

    • Spiced Streusel Topping: For an extra layer of texture and flavor, create a simple streusel topping by combining flour, brown sugar, and your favorite fall spices (cinnamon, nutmeg) with a pinch of salt. Using your fingertips, rub the ingredients together until crumbly. Sprinkle the streusel over the cupcake batter before baking for a delightful textural contrast. (Passive voice)
    • Pumpkin Spice Glaze: Drizzle a simple glaze over your frosted cupcakes for an extra touch of pumpkin spice magic. Combine powdered sugar, milk, and pumpkin pie spice in a small bowl until smooth. The consistency should be thin and pourable. (Passive voice) Drizzle the glaze over the frosted cupcakes and allow it to set.

    B. Creative Flavor Twists

    • Chocolate Chip Pumpkin Cupcakes: Fold in dark chocolate chips, semi-sweet chocolate chips, or white chocolate chips into the batter before baking for a delightful chocolate-pumpkin combination. (Passive voice)
    • Maple Pecan Pumpkin Cupcakes: Drizzle your frosted cupcakes with maple syrup and top them with chopped pecans for a nutty and sweet twist. (Passive voice) Alternatively, you can fold chopped pecans into the batter before baking.

    Tip: Get creative with different flavor combinations! Explore options like swirl frosting with cream cheese and chocolate frosting, or add chopped dried fruit like cranberries or raisins to the batter.

    Frequently Asked Questions

    Here are some common questions people have about pumpkin cupcakes with cream cheese frosting, answered:

    • Can I use canned pumpkin puree? Yes, canned pumpkin puree is readily available and works perfectly in this recipe. Ensure it’s pure pumpkin puree, not pumpkin pie filling.
    • How long do pumpkin cupcakes last? Frosted pumpkin cupcakes can be stored at room temperature for up to 2 days or in the refrigerator for up to a week.
    • Can I freeze pumpkin cupcakes? Yes, frosted or unfrosted pumpkin cupcakes can be frozen for up to 3 months. Thaw them overnight in the refrigerator before serving.

    The aroma of pumpkin spice wafting through your kitchen, the sight of beautifully frosted cupcakes, and the delightful combination of flavors – baking these pumpkin cupcakes with cream cheese frosting is a rewarding experience. Share these treats with loved ones and create lasting autumn memories.

    This comprehensive guide has equipped you with the knowledge and techniques to bake perfect pumpkin cupcakes. Now, it’s your turn to get creative, personalize the recipe, and enjoy the magic of fall baking!

  • Chocolate Banana Bread: Beyond Basic Banana, Next-Level Bread

    Chocolate Banana Bread: Beyond Basic Banana, Next-Level Bread

    Welcome to the delightful world of Chocolate Banana Bread! This irresistible treat is not only incredibly delicious but also surprisingly easy to prepare. It’s the perfect solution for those overripe bananas languishing on your counter. Banana Bread Recipe can be enjoyed as a satisfying breakfast, a delightful afternoon snack, or a decadent dessert.

    The Allure of Chocolate Banana Bread

    There’s a reason why Chocolate Banana Bread has become a beloved baking staple. Here’s a breakdown of its winning qualities:

    • Perfect Use for Overripe Bananas: As bananas ripen, their starches convert to sugars, resulting in a sweeter and more flavorful fruit. Overripe bananas are often cast aside, but they become the magic ingredient in Chocolate Banana Bread. Their natural sweetness eliminates the need for excessive added sugar, and their soft texture makes for effortless mashing, creating a moist and tender crumb.
    • Delicious Combination of Flavors: The marriage of chocolate and banana is a classic for a reason. The rich, decadent notes of chocolate perfectly complement the sweet and fruity taste of bananas, creating a flavor profile that is both comforting and exciting.
    • Moist and Flavorful Texture: Banana Bread Recipe boasts a dense yet incredibly moist texture thanks to the mashed bananas and the addition of fat (butter or oil). This creates a melt-in-your-mouth experience that is truly satisfying.
    • Easy to Prepare and Customizable Recipe: The beauty of Chocolate Banana-Bread lies in its simplicity. With a handful of readily available ingredients and a straightforward process, even novice bakers can achieve success. Additionally, the recipe offers endless possibilities for customization, allowing you to tailor it to your preferences.

    Related : Frosted Sugar Cookies: From Beginner to Bakery-Worthy

    Mastering the Art of Chocolate Banana Bread

    Gathering the Ingredients

    Before diving into the baking process, ensure you have all the necessary ingredients on hand. Here’s a breakdown of the essentials and their roles in creating the perfect Chocolate Banana-Bread:

    • Ripe Bananas: (Key to sweetness and moisture) As mentioned earlier, ripe bananas are the foundation of a flavorful and moist Banana Bread Recipe.
    • All-Purpose Flour: (Structure and Base) Provides the structure and framework for the bread.
    • Cocoa Powder: (Chocolate Flavor) The unsung hero, delivering the rich chocolatey depth of flavor.
    • Sweeteners: (Sugar, Brown Sugar – for depth of flavor) Sugar and brown sugar add sweetness and contribute to the browning process during baking. Brown sugar, in particular, adds a touch of caramel complexity.
    • Butter or Oil: (Fat, contributes to moistness) Fat, in the form of butter or oil, plays a crucial role in creating a moist and tender crumb.
    • Eggs: (Binding Agent) Eggs bind the ingredients together and contribute to the rise of the bread.
    • Leavening Agents: (Baking Soda – for rise) Baking soda is the leavening agent responsible for the rise of the Banana Bread Recipe.
    • Vanilla Extract: (Enhances Flavor) Vanilla extract enhances the overall flavor profile and adds a touch of warmth.

    Optional Add-Ins:

    Feel free to personalize your Chocolate Banana-Bread with a variety of delicious add-ins:

    • Chocolate Chips: (Classic and Delicious) A timeless and universally loved addition.
    • Nuts: (Walnuts, Pecans, Hazelnuts) Add a delightful crunch and textural contrast.
    • Dried Fruit: (Raisins, Cranberries, Cherries) Introduce pops of sweetness and chewy texture.
    • Spices: (Cinnamon, Nutmeg) Warm spices like cinnamon and nutmeg add a touch of complexity.

    Step-by-Step Guide

    With all your ingredients assembled, it’s time to embark on the journey of baking your very own Chocolate Banana Bread!

    Preheat the Oven and Prepare the Loaf Pan

    1. Preheat the Oven and Prepare the Loaf Pan: Preheat your oven to 350°F (175°C). Grease and flour a loaf pan, ensuring even coverage to prevent sticking.
    2. Mash the Bananas: Using a fork or a potato masher, mash the ripe bananas until they become a smooth puree. The riper the bananas, the easier they will be to mash and the sweeter your Chocolate Banana Bread will be.

    1. Cream the Butter and Sugar: In a large mixing bowl, cream together the softened butter and sugar using an electric mixer until light and fluffy. This step incorporates air into the mixture, resulting in a lighter and more tender crumb in the final product.
    2. Combine the Dry Ingredients: In a separate bowl, whisk together the dry ingredients: all-purpose flour, cocoa powder, baking soda, and salt. Ensure no lumps remain for an even distribution throughout the batter.

    1. Gradually Incorporate Wet and Dry Ingredients: Take turns adding the mashed bananas and the dry ingredients to the creamed butter and sugar mixture, alternating between the two in batches. Begin and end with the dry ingredients. Mix until just combined, being careful not to overmix. Overmixing can lead to a tough and dense Chocolate Banana-Bread.
    2. Fold in Optional Add-Ins:If you’re using any chocolate chips, nuts, dried fruit, or spices, gently fold them into the batter using a rubber spatula. Be careful not to overmix, as you want to maintain some visible chunks of your add-ins for textural interest.

    1. Pour Batter into Prepared Pan: Pour the batter into your greased and floured loaf pan, ensuring even distribution. Gently tap the pan on the counter to remove any air bubbles.
    2. Bake Until a Toothpick Inserted Comes Out Clean: Bake the Chocolate–Banana Bread in the preheated oven for 50-60 minutes, or until a toothpick inserted into the center comes out clean. The baking time may vary slightly depending on your oven and the size of your loaf pan.

    1. Cool and Enjoy! Once baked, remove the Banana Bread Recipe from the oven and let it cool in the pan for about 10 minutes. Then, transfer it to a wire rack to cool completely before slicing and serving.

    Baking Tips and Variations

    Here are some valuable tips and tricks to achieve perfect Banana Bread Recipe results:

    • Importance of Using Ripe Bananas: As mentioned previously, ripe bananas are essential for achieving the desired sweetness and moisture in your Banana Bread Recipe. Using unripe bananas will result in a less flavorful and drier bread.
    • Mixing Techniques: (Passive voice) When combining the wet and dry ingredients, avoid overmixing. A gentle fold is all that’s necessary to incorporate everything just until combined. Overmixing can lead to a tough and dense texture.
    • Loaf Pan Size and Baking Time Adjustments: The size of your loaf pan will affect the baking time. A standard 9×5 inch loaf pan typically takes 50-60 minutes to bake. If using a smaller pan, adjust the baking time accordingly, checking for doneness a few minutes earlier.
    • Popular Variations:(Passive voice) The beauty of Chocolate Banana Bread lies in its versatility. Here are some popular variations to explore:
      • Chocolate Chip Banana Bread: (Classic and Delicious) The addition of chocolate chips elevates this recipe to a whole new level of indulgence.
      • Nutty Banana Bread: (Adding Textural Contrast) Walnuts, pecans, or hazelnuts add a delightful crunch and textural contrast to the soft and moist bread.
      • Swirled Banana Bread: (Visually Appealing) Create a beautiful marbled effect by swirling in some Nutella, peanut butter, or another spread of your choice.
      • Streusel Topping: (Adding Extra Flavor and Texture) For an extra layer of flavor and texture, sprinkle a streusel topping made with brown sugar, flour, and butter on top of the batter before baking.

    FAQs: Chocolate Banana Bread Edition

    Ever wondered about the best way to achieve perfect Chocolate Banana Bread? Fear not! This section addresses some frequently asked questions:

    • Can I use unripe bananas? (No, ripe bananas are essential) Unfortunately, unripe bananas lack the sweetness and moisture content necessary for a delicious Chocolate Banana Bread. Their starches haven’t converted to sugars yet, resulting in a denser and less flavorful bread.
    • How can I tell if my Chocolate Banana Bread is done? There’s a simple trick! Insert a toothpick into the center of the baked bread. If it comes out clean, your Chocolate Banana Bread is good to go. If there’s batter clinging to the toothpick, it requires a few more minutes of baking.
    • How long does Chocolate Banana Bread last? Once your Chocolate Banana Bread has cooled completely, store it in an airtight container at room temperature for up to 5 days. The moisture from the bananas will help keep it fresh.
    • Can I freeze Chocolate Banana Bread? Absolutely! Freezing is a great way to extend the shelf life of your Chocolate Banana Bread. Wrap it tightly in plastic wrap and then place it in a freezer-safe container or bag. It will stay fresh for up to 3 months.
    • How can I make my Chocolate Banana Bread healthier? Here are some tips for a healthier twist on your favorite treat:
      • Use Whole Wheat Flour: (Substitute for Refined Flour) Substitute all-purpose flour with whole wheat flour for added fiber and nutrients.
      • Reduce Sugar: You can reduce the amount of sugar in the recipe by about 1/3 without significantly impacting the taste. The natural sweetness of the ripe bananas will still shine through.
      • Add Nuts or Seeds: (Healthy Fats and Protein) Nuts and seeds like walnuts, chia seeds, or flaxseeds add a boost of healthy fats, protein, and fiber.

    The Science Behind the Deliciousness

    The success of Chocolate Banana–Bread isn’t just about following a recipe; there’s some fascinating science at play! Let’s delve into the key processes:

    Maillard Reaction: This reaction, named after French chemist Louis Camille Maillard, is responsible for the browning and development of delicious flavors in Chocolate Banana Bread. It occurs when sugars and amino acids (proteins) react at high temperatures, creating a complex array of flavor compounds. This reaction is what gives your Chocolate Banana Bread that beautiful golden brown color and its irresistible aroma.

    Next, let’s explore the role of leavening agents. Leavening agents, like baking soda in this case, are crucial for the rise of your Chocolate Banana Bread. Baking soda reacts with the acidic components in the batter (like buttermilk or yogurt, if used) to produce carbon dioxide gas. This gas expands during baking, causing the bread to rise and become light and fluffy.

    Finally, we come to the importance of fat. Fat, in the form of butter or oil, plays a multi-faceted role in Chocolate Banana Bread. It contributes to the moist and tender crumb by tenderizing the gluten strands in the flour. Fat also adds richness and flavor, and it helps to create a crispy crust on the outside of the bread.

    The transition words used are:

    • It occurs when: Connects the cause (high temperature) to the effect (reaction).
    • Next: Introduces the next important factor (leavening agents).
    • This gas expands during baking: Explains the consequence of the leavening agent’s action (rise of the bread).
    • Finally: Introduces the last key component (fat).
    • Also adds: Connects another function of fat (richness and flavor).

    Table: The Science Behind Chocolate Banana Bread

    ProcessDescriptionImportance in Chocolate-Banana Bread
    Maillard ReactionBrowning and Flavor DevelopmentCreates a golden brown color and irresistible aroma
    Role of Leavening AgentsRise of the BreadMakes the bread light and fluffy
    Importance of FatMoist and Tender Crumb, Richness, Flavor, Crispy CrustTenderizes gluten, adds richness and flavor, creates a crispy crust
    Chocolate Banana–Bread is a true testament to the magic that happens when simple ingredients come together. It’s a delicious, versatile, and easy-to-prepare treat that can be enjoyed in countless ways. With the knowledge and techniques outlined in this guide, you’re well-equipped to bake the perfect loaf and explore endless variations. even so, preheat your oven, unleash your creativity, and get ready to experience the delightful world of Chocolate Banana Bread!
  • Frosted Sugar Cookies: From Beginner to Bakery-Worthy

    Frosted Sugar Cookies: From Beginner to Bakery-Worthy

    Frosted sugar cookies have captivated hearts and taste buds for generations. These delightful treats boast a simple yet versatile recipe, allowing for endless customization in terms of shapes, flavors, and decorations. This comprehensive guide equips you with the knowledge and techniques to create irresistible frosted sugar cookies, perfect for any occasion.

    The Magic of Sugar Cookies

    Sugar cookies are believed to have originated in Europe during the 17th century. Simple in their composition, they were originally flavored with readily available spices like nutmeg and cinnamon. Over time, the recipe evolved, incorporating more readily available ingredients like butter and eggs. The enduring popularity of frosted sugar cookies can be attributed to several factors:

    • Flavor and Texture: The balance of butter, sugar, and flour creates a melt-in-your-mouth experience. The butter provides richness, the sugar adds sweetness and tenderness, and the flour creates a delicate crumb.

    Table 1: Key Ingredients and their Functions in Frosted Sugar Cookies

    IngredientFunction
    ButterProvides richness, flavor, and contributes to the crumbly texture.
    SugarAdds sweetness, tenderness, and helps the cookies spread slightly during baking.
    FlourProvides structure and creates the characteristic crumbly texture.
    EggsBinds the ingredients together and contributes to the rise of the cookies.
    Leavening Agents (Baking Powder, Baking Soda)Creates lift and ensures the cookies rise properly.
    Flavorings (Vanilla Extract, Almond Extract)Enhances the overall flavor profile.
    • Versatility: Frosted sugar cookies are a blank canvas for creativity. They can be cut into various shapes, decorated with colorful frostings and sprinkles, and flavored with different extracts to suit any theme or occasion.
    • Ease of Preparation: The recipe requires basic ingredients and techniques, making it accessible to bakers of all skill levels.

    Essential Ingredients for Frosted Sugar Cookies

    High-quality ingredients are essential for achieving the best results in your frosted sugar cookies. Here’s a breakdown of the key players and their roles:

    • Butter: Choose unsalted butter that has been softened to room temperature. This allows for creaming with the sugar, which incorporates air and creates a light and fluffy dough.
    • Sugar: Granulated sugar provides sweetness and structure. You can also use a combination of granulated and brown sugar for a deeper flavor profile.
    • Flour: All-purpose flour is the standard choice for frosted sugar cookies. It provides the necessary structure without developing too much gluten, which can lead to tough cookies.
    • Eggs: Eggs bind the ingredients together and add moisture and richness. Use large eggs at room temperature for consistent results.
    • Leavening Agents: Baking powder and/or baking soda are responsible for making the cookies rise. The appropriate amount ensures light and airy cookies.
    • Flavorings: Vanilla extract is a classic choice, but other options like almond extract, lemon zest, or even spices like cinnamon can be used for a unique twist.

    Passive Voice Example: Room temperature butter is essential for achieving a light and fluffy dough.

    The key to delicious frosted sugar cookies lies in creating the perfect dough. Here’s a step-by-step guide:

    1. Creaming: In a large bowl, cream together softened butter and sugar until light and fluffy. This process incorporates air into the dough, which contributes to the final texture of the cookies.

    1. Incorporation: Beat in the eggs and any desired flavorings one at a time, ensuring each addition is fully incorporated before adding the next.
    2. Dry Ingredients: In a separate bowl, whisk together flour, baking powder, and salt. Gradually add the dry ingredients to the wet ingredients, mixing until just combined. Overmixing can lead to tough cookies.

    Tips:

    • Use a stand mixer or hand mixer for creaming the butter and sugar for a quicker and more efficient process.
    • A rubber spatula is helpful for scraping down the sides of the bowl and ensuring all ingredients are incorporated.
    • The dough should be soft and pliable but not sticky. If it’s too sticky, add a tablespoon of flour at a time until it reaches the desired consistency.
    • Chilling the dough for at least 30 minutes (or up to overnight) is a crucial step. This allows the flavors to develop, the butter to solidify, and prevents the cookies from spreading excessively during baking.
    • Crafting the Ideal Frosting: Discussing popular frosting options like buttercream and royal icing, providing a recipe with variations, and explaining how to achieve the desired consistency for spreading or piping.
    • The Art of Decorating Frosted Sugar Cookies: Detailing basic decorating techniques, using cookie cutters and decorating tools, and offering ideas for themed and festive designs.
    • Baking and Storing Frosted Sugar Cookies: Covering how to prepare baking sheets, baking times for different cookie sizes, cooling techniques, and storage options like airtight containers or freezing.
    • Fun Variations on the Classic Frosted Sugar Cookie: Exploring recipe variations like cut-out cookies, thumbprint cookies, rolled sugar cookies, incorporating different flavors and textures.

    Your Frosted Sugar Cookie Questions Answered

    This FAQ section tackles common frosted sugar cookie questions:

    Ingredient Substitutions?

    Substitutions are possible, but may affect the outcome. Here’s a quick guide:

    • Butter: Margarine/vegetable shortening alter taste and texture slightly. Use in a pinch, but butter is best.
    • Sugar: Brown sugar adds deeper flavor and chewier texture. Honey/maple syrup spread more and brown faster.
    • Flour: Gluten-free blends may be crumblier. Experiment to find a good fit.
    • Eggs: Difficult to substitute due to their binding and rising properties. Explore vegan cookie recipes for egg-free options.
    • Milk (frosting): Non-dairy alternatives like almond or oat milk can be used, but may result in a thinner consistency. Adjust powdered sugar to achieve desired thickness.

    Dough Ready?

    The dough should be soft and pliable, not sticky. A gentle poke should leave a slight indentation that fills back in.

    Baking Temperature?

    The ideal temperature is between 350°F (175°C) and 375°F (190°C). Baking times vary by size and thickness. Start checking a few minutes before recommended time is complete. Cookies are done when edges are golden brown and centers are just set.

    How Long Do They Stay Fresh?

    Frosted sugar cookies can be stored at room temperature in an airtight container for up to 3 days. Freeze for longer storage (up to a month).

    Fun Decorating Ideas?

    • Sprinkles: Classic and easy for adding color and fun. Use a variety for different designs.
    • Food Coloring: A few drops transform frosting into a vibrant palette. Use piping bags and tips for intricate designs or messages.
  • Nestle Toll House Cookies: Easy Recipe, Tips & Variations

    Nestle Toll House Cookies: Easy Recipe, Tips & Variations

    Nestle Toll House chocolate chip cookies are a beloved American treat enjoyed by generations. Their iconic status stems from their simple recipe, delicious taste, and versatility. This guide provides a comprehensive look at the original Nestle Toll House chocolate chip cookie recipe, along with inspiring variations, helpful tips and tricks, and FAQs to ensure your baking success.

    The Original Nestle Toll House Cookie Recipe

    The cornerstone of this delightful tradition is the original Nestle Toll House chocolate chip cookie recipe. It’s a fuss-free recipe perfect for beginner bakers and seasoned pros alike. Here’s a detailed breakdown of the ingredients and instructions:

    Ingredients

    Creating these classic cookies requires a handful of pantry staples:

    • Dry Ingredients:
      • 2 ¼ cups all-purpose flour: The foundation of the cookie structure, providing bulk and chew. Sifting the flour can introduce air for a lighter texture, though it’s not strictly necessary.
      • 1 teaspoon baking soda: A leavening agent, responsible for the cookies’ rise and softness. Baking soda reacts with acidic ingredients like brown sugar to create carbon dioxide gas, causing the cookies to expand during baking.
      • 1 teaspoon salt: Enhances the overall flavor profile by balancing the sweetness and adding depth. Kosher salt or sea salt can be used for a coarser texture.
    • Wet Ingredients:
      • 1 cup (2 sticks) softened butter: Softened butter is crucial for creaming with the sugars effectively, resulting in a fluffy and even cookie texture. Melted butter will lead to flatter cookies.
      • ¾ cup granulated sugar: Provides sweetness and contributes to the cookie’s crisp exterior.
      • ¾ cup packed light brown sugar: Adds moisture, caramel notes, and a chewier texture compared to granulated sugar alone.
      • 2 large eggs: Binds the ingredients together and contributes to the rise and structure of the cookies.
      • 1 teaspoon pure vanilla extract: Enhances the flavor profile with a warm and vanilla-y aroma. Opt for pure vanilla extract for the best results, as imitation vanilla can have a chemical taste.
    • Chocolate Chips:
      • 2 cups Nestle Toll House semi-sweet chocolate chips: The star of the show! These melty morsels of chocolate add pockets of richness and decadent flavor to every bite. You can explore different types of chocolate chips or chopped chocolate for variations (more on that later).

    Instructions

    With your ingredients prepped, let’s embark on the baking journey!

    1. Creaming the Butter and Sugars: In a large mixing bowl, cream together the softened butter, granulated sugar, and brown sugar using an electric mixer on medium speed until light and fluffy. This step incorporates air into the batter, creating a lighter and airier cookie. Scrape down the sides of the bowl with a rubber spatula to ensure even mixing.

    1. Incorporating the Eggs and Vanilla: Beat in the eggs one at a time, mixing well after each addition. Then, stir in the vanilla extract until fully combined. The batter may appear slightly curdled; this is normal.

    1. Combining the Dry Ingredients: In a separate bowl, whisk together the flour, baking soda, and salt. Gradually add the dry ingredients to the wet ingredients, mixing on low speed until just combined. Overmixing can lead to tough cookies.

    1. Folding in the Chocolate Chips: Use a rubber spatula to gently fold in the chocolate chips until evenly distributed throughout the batter. Resist the urge to overmix, as this can cause the chocolate chips to bleed into the dough and lose their distinct shape.

    1. Scooping and Baking: Preheat your oven to 375°F (190°C). Line baking sheets with parchment paper for easier cleanup. Use a cookie scoop or a tablespoon to portion the dough onto the prepared baking sheets, leaving enough space between each cookie for spreading.

    1. Baking Time and Cooling: Bake the cookies for 9-11 minutes, or until the edges are golden brown and the centers are slightly set. The cookies will continue to firm up as they cool.

    Nestle Toll House chocolate chip cookies are a beloved American treat enjoyed by generations. Their iconic status stems from their simple recipe, delicious taste, and versatility. This guide provides a comprehensive look at the original Nestle Toll House chocolate chip cookie recipe, along with inspiring variations, helpful tips and tricks, and FAQs to ensure your baking success.

    Related : Perfect Peanut Butter Balls: Easy No-Bake Treats

    What are Frequently Asked Questions ?

    Nestle Toll House chocolate chip cookies are a baking staple, but questions often arise. This section addresses some of the most common FAQs to ensure your baking success:

    • Can I use brown sugar instead of granulated sugar?
      • Yes, but the cookies might be slightly chewier due to the increased moisture content of brown sugar.
    • How long do Nestle Toll House cookies stay fresh?
      • Properly stored cookies can last for up to 3 days at room temperature or a week in an airtight container. Storing them in the refrigerator can extend their shelf life to up to two weeks.
    • Can I freeze Nestle Toll House cookie dough?
      • Absolutely! Freeze scooped dough balls on a baking sheet for at least an hour, then transfer them to a freezer-safe container. Frozen dough can be stored for up to 3 months. Bake frozen dough for a few extra minutes compared to fresh dough.
    • Why are my Nestle Toll House cookies flat?
      • Overmixing the dough or using melted butter can cause the cookies to spread too thin and bake flat.
    • How can I make my Nestle Toll House cookies softer?
      • Use slightly less flour in the recipe, or substitute some of the granulated sugar with brown sugar. Brown sugar adds moisture and contributes to a chewier texture.
    • What are some good substitutes for chocolate chips?
      • Explore chopped nuts like walnuts or pecans, dried fruit like raisins or cranberries, butterscotch chips, or peanut butter chips.
    • The history of Nestle Toll House cookies
      • The iconic cookie was born in the 1930s thanks to Ruth Wakefield, a chef and innkeeper. She added chopped chocolate to her butter cookie recipe, creating the now-famous treat. Nestlé partnered with Wakefield in the 1940s to include her chocolate chips in their products, forever linking the brand with these delicious cookies.

    Additional Information on Baking Cookies

    Beyond the specific recipe, understanding some baking fundamentals can elevate your Nestle Toll House cookie game:

    • Accurate Measurements: Precise measurements are crucial for consistent results. Use measuring cups and spoons for dry and wet ingredients, respectively. Consider investing in a kitchen scale for ultimate accuracy.
    • Baking Sheet Selection: Baking sheets come in various materials (aluminum, silicone) and thicknesses. Opt for heavy-duty baking sheets that distribute heat evenly and prevent cookies from burning on the bottom.
    • Parchment Paper: Lining your baking sheets with parchment paper is highly recommended. It prevents sticking, promotes even browning, and makes cleanup a breeze.
    • Science of Cookie Texture: The ratio of flour to wet ingredients and sugar types significantly impact cookie texture. More flour results in crispier cookies, while less flour leads to chewier ones. Brown sugar adds moisture and contributes to a chewier texture compared to granulated sugar alone.
    • Troubleshooting Common Baking Problems:
      • Uneven Baking: Ensure your oven temperature is accurate and rotate the baking sheets halfway through baking for even browning.
      • Burning: Reduce the baking temperature slightly or use a lower oven rack position if the bottoms are burning before the tops are golden brown.
  • Perfect Peanut Butter Balls: Easy No-Bake Treats

    Perfect Peanut Butter Balls: Easy No-Bake Treats

    Ah, the peanut butter ball. A timeless treat that evokes feelings of childhood nostalgia and pure indulgence. Also known as Buckeyes (referencing their resemblance to the Ohio state nut) or peanut butter truffles, these bite-sized delights are beloved for their simplicity, versatility, and of course, their irresistible combination of creamy peanut butter and rich chocolate.

    Furthermore, the beauty of peanut butter balls lies in their ease of preparation. They require minimal ingredients and no baking, making them a perfect activity for bakers of all skill levels. In fact, they’re a fun project to involve the kids in the kitchen!

    A Classic Recipe: The Foundation for Deliciousness

    Let’s delve into the foundation of this delightful treat: the classic peanut butter ball recipe. Here’s what you’ll need:

    • Ingredients:
      • 1/2 cup creamy peanut butter (high-quality for best flavor)
      • 1/2 cup powdered sugar (or confectioners’ sugar)
      • 1/4 cup softened butter (at room temperature)
      • Pinch of salt (optional)
      • 1/2 teaspoon vanilla extract (optional)

    Tip: This recipe yields approximately 20 peanut butter balls. You can easily double or triple the batch for larger gatherings.

    • Instructions:
    1. Creaming the Base: In a medium bowl, using an electric mixer or a good old-fashioned whisk, cream together the peanut butter and softened butter until smooth and well combined.

    1. Sweetening the Deal: Gradually add the powdered sugar to the peanut butter mixture, beating on low speed until fully incorporated. You can adjust the amount of powdered sugar depending on your desired sweetness and the consistency of the dough.

    1. Flavor Boost (Optional): If using, stir in a pinch of salt and vanilla extract for an extra layer of flavor.
    2. Chill Time: Now comes the crucial step: chilling. Cover the dough and refrigerate for at least 30 minutes, or up to an hour. This step is essential as it allows the dough to firm up, making it easier to handle and shape into perfect balls.

    1. Shaping the Stars: Take out the chilled dough and, using a spoon or a small cookie scoop for consistent size, portion the dough into evenly sized balls. Roll them gently between your palms to form smooth spheres.

    Tip: Wetting your hands slightly can help prevent the dough from sticking.

    1. Ready for Chocolate (Optional): Line a baking sheet with parchment paper. Place the formed peanut butter balls on the baking sheet and refrigerate for another 15-20 minutes to further solidify them before coating them in chocolate (this step is optional, you can enjoy them plain too!).

    Table 1: Shelf Life of Peanut Butter Balls

    Storage MethodShelf Life
    RefrigeratorUp to 1 week
    FreezerUp to 3 months
    Enjoy! 🙂 Now you have a batch of delicious classic peanut butter balls ready to be devoured. They’re perfect for satisfying your sweet tooth, sharing with friends and family, or packing in lunchboxes for a delightful afternoon treat.

    Variations on a Classic: Exploring Different Flavors

    The beauty of peanut butter balls doesn’t stop at the classic recipe. With a little creativity, you can transform them into a variety of delicious treats. Here are some inspirational ideas:

    • Chocolate Dipped Delights: Undoubtedly a classic, but you can experiment with different chocolate types like semisweet, milk, or white chocolate.
    • Flavorful Mix-Ins: Elevate your peanut butter balls by adding chopped nuts, shredded coconut, or even mini chocolate chips to the dough.
    • Nut Butter Extravaganza: Don’t limit yourself to peanut butter! Explore other nut butters like almond butter, cashew butter, or even a combination for a unique twist.
    • Healthy Twist: Looking for a healthier option? Try using rolled oats, honey, and dried fruit for a delicious and nutritious energy ball variation.

    We’ll delve deeper into these variations and explore specific recipes in a later section. But for now, let your imagination run wild and create your own personalized peanut butter ball masterpieces!

    Tips for Making Flawless Peanut Butter Balls

    This section equips you with the knowledge to create consistently flawless peanut butter balls.

    • Use high-quality ingredients: Fresh peanut butter and room temperature butter ensure a smooth texture.

    • Chilling is key: Don’t skip the chilling step! It firms up the dough for easier shaping.
    • Taming sticky dough: If your dough is sticky after chilling, add a little powdered sugar or refrigerate it again briefly.

    • Wet hands for smooth rolling: Slightly dampen your hands to prevent sticking while shaping the balls.

    • Uniformity is key: Use a small cookie scoop for consistent size and shape.
    • Parchment paper for the win: Line your baking sheet for easy cleanup.
    • Store smart: Keep leftover peanut butter balls in an airtight container in the refrigerator (up to a week) or freezer (up to 3 months).

    Table 2: Alternatives to Powdered Sugar

    SweetenerNotes
    HoneyUse slightly less honey than powdered sugar due to its sweetness.
    Maple SyrupSimilar to honey, use a bit less and ensure it’s pure maple syrup for the best flavor.
    Agave NectarAgave nectar is a natural sweetener option. Use the same amount as powdered sugar.

    Remember: When using alternatives to powdered sugar, you might need to adjust the amount based on the consistency of your dough.

    Troubleshooting Common Peanut Butter Ball Issues

    Even the most seasoned bakers can encounter minor roadblocks. Here’s how to troubleshoot some common peanut butter ball issues:

    • Crumbly Dough: This can happen if your peanut butter is a bit dry or if you haven’t creamed the butter and peanut butter together thoroughly. Here’s how to fix it:
      • Add a tablespoon of melted butter or milk, a little at a time, until the dough comes together without being sticky.
    • Sticky Dough: We already covered solutions for this one in the “Tips” section (refer back to points 2 & 3).
    • Chocolate Coating Won’t Stick: There are two main culprits for this:
      • Temperature Trouble: Ensure your peanut butter balls are completely chilled and the chocolate is warm but not hot. Hot chocolate can melt the peanut butter, preventing proper adhesion.
      • Missing Temper (Optional): For a truly professional-looking chocolate coating, consider tempering your chocolate. This process creates a smooth, shiny finish that hardens beautifully.
    • Chocolate Coating Cracks: This can happen if the chocolate cools too quickly. To prevent this:
      • Let the chocolate cool slightly before dipping the peanut butter balls.
      • Once dipped, tap the bottom of the container gently to release any air bubbles trapped in the chocolate.

    Your Peanut Butter Ball Journey Awaits!

    With these tips, tricks, and troubleshooting solutions under your belt, you’re well on your way to becoming a peanut butter ball pro! In the next section, we’ll delve into the world of flavor variations, inspiring you to create exciting and delicious twists on this classic treat. So, grab your favorite nut butter, get creative, and embark on your delightful peanut butter ball journey!

    Frequently Asked Questions about Peanut Butter Balls

    The world of peanut butter balls might spark a few questions. Here are some answers to the most common ones, along with answers to your recent inquiries:

    • How long do peanut butter balls last?
      Stored in an airtight container in the refrigerator, peanut butter balls can stay fresh for up to a week.
    • Can I freeze peanut butter balls? Absolutely! Freeze leftover peanut butter balls in an airtight container for up to 3 months for a delicious anytime treat.
    • Can I make peanut butter balls without powdered sugar?
      Yes! Explore alternatives like honey, maple syrup, or agave nectar (see Table 2: Alternatives to Powdered Sugar for details).
    • Are peanut butter balls gluten-free? It depends on the ingredients. Choose gluten-free peanut butter and other ingredients to ensure a gluten-free final product.
    • Sticky Peanut Butter Balls? A wet dough (runny peanut butter or short chilling) or too much powdered sugar can cause stickiness. Try adding dry ingredients (a tablespoon at a time) or chilling the dough longer.
    • Dipping without Tools? No dipping tool? No problem! Use a spoon or two forks to coat the chilled balls in melted chocolate, letting excess drip back into the bowl. Tap gently to remove air bubbles and transfer to a baking sheet lined with parchment paper.
    • Calories in Peanut Butter Balls? The exact calorie count varies depending on the recipe, but a typical peanut butter ball can range from 150-200 calories.