Ever wondered how to make those awesome peanut butter balls that everyone raves about? Well, wonder no more! These tasty treats are surprisingly easy to whip up and perfect for satisfying your sweet tooth.
In this guide, we’ll break down the classic “how to make peanut butter balls” recipe into simple steps, making it a breeze for anyone to create delicious homemade treats. But we won’t stop there! We’ll also explore tons of fun flavor combos and mix-in ideas to take your peanut butter balls from ordinary to extraordinary.
So, grab your mixing bowl and get ready to embark on a delicious journey of peanut buttery goodness! This guide will turn you into a peanut butter ball pro in no time, whether you’re a baking whiz or a kitchen newbie. Let’s get rolling!
Why We Love Those Peanut Butter Balls ?
For generations, peanut butter balls have been a beloved treat, gracing kitchens and cookie jars across the globe. But what is it about these humble bites that have captured our hearts (and taste buds)? The answer lies in their delightful simplicity. Peanut butter balls are the perfect marriage of creamy peanut butter and powdered sugar, offering a satisfying sweetness with a hint of nutty richness. They’re incredibly easy to make, requiring no fancy equipment or baking skills. Plus, they’re a budget-friendly treat that can be enjoyed by people of all ages. Peanut butter balls also evoke a sense of nostalgia, bringing back happy memories of childhood bake sales and holiday gatherings.
Table 1: Why We Love Peanut Butter Balls
| Feature | Description |
|---|---|
| Easy to Make | Requires minimal ingredients and equipment |
| Budget-Friendly | Affordable ingredients for a delicious treat |
| Versatile | Endless flavor combinations and mix-in options |
| Nostalgia Factor | Evokes happy childhood memories |
| Crowd-Pleaser | Loved by people of all ages |
Making Peanut Butter Balls: A Step-by-Step Guide
Before we delve into the delightful world of flavor variations and creative mix-ins, let’s solidify the foundation – the classic peanut butter ball recipe. Here’s a step-by-step guide that will have you whipping up these tasty treats in no time!
Ingredients & Gear
Gather your ingredients:
- 1/2 cup creamy peanut butter (smooth or chunky, depending on your preference)
- 3 Tbsp softened butter
- 1 cup powdered sugar
- 1 Tbsp milk (optional, for adjusting consistency)
- Pinch of salt (optional)
Basic tools you’ll need:
- Mixing bowl
- Spoon
- Measuring cups
- Baking sheet
- Parchment paper (optional, but recommended)
Don’t worry, you probably already have everything you need in your kitchen!
Directions
- Creamy Dream Team: In your mixing bowl, combine the softened butter and peanut butter. Using a spoon or electric mixer, cream them together until smooth and well-blended.
- Sweet Surrender: Gradually add the powdered sugar to the creamy peanut butter mixture, a little at a time. Mix well after each addition to ensure everything is evenly incorporated .
- Consistency Check: Now comes the fun part – tasting! Sample a small amount of the mixture to assess the consistency. It should be firm enough to hold its shape when rolled into balls, but not too dry or crumbly. If the mixture feels too dry, add the optional tablespoon of milk, a little at a time, until you reach the desired consistency.
- Ballin’: Using a spoon or your hands, portion out the peanut butter mixture into bite-sized pieces. Roll each piece into a smooth ball between your palms.
- Chill Out: Place the rolled peanut butter balls on a baking sheet lined with parchment paper (optional, but helps prevent sticking). Pop those balls in the fridge to firm up for at least 30 minutes, or until completely chilled .
There you have it! Perfectly formed peanut butter balls ready for enjoying or customizing with your favorite toppings.
Take Your Peanut Butter Balls Up a Notch
Classic Peanut Butter Ball Recipe
Now that you’ve mastered the basic peanut butter ball technique, it’s time to explore the exciting world of flavor variations! This classic recipe is a delicious starting point for all your creative endeavors.
Ingredients:
- 1 cup creamy peanut butter (smooth or chunky, depending on your preference)
- ½ cup softened butter
- 3 ½ cups powdered sugar
- Pinch of salt (optional)
Instructions:
- Creamy Canvas: In a large mixing bowl, cream together the softened butter and peanut butter until light and fluffy.
- Sweetening the Deal: Gradually add the powdered sugar to the peanut butter mixture, a ½ cup at a time, mixing well after each addition until fully incorporated .
- Salty Surprise: If you prefer a hint of savory complexity, add a pinch of salt to the mixture and mix well.
- Ballin’ Time: Using a spoon or cookie scoop, portion out the peanut butter mixture into bite-sized pieces. Roll each piece into a smooth ball between your palms.
- Chill Zone: Place the rolled peanut butter balls on a baking sheet lined with parchment paper. Refrigerate for at least 30 minutes, or until firm.
Tips:
- For a richer flavor, use dark or natural peanut butter.
- You can substitute almond butter, sunflower seed butter, or another nut butter of your choice for a nut allergy-friendly option.
- Dip the chilled peanut butter balls in melted chocolate, sprinkles, or chopped nuts for an extra layer of flavor and texture .
NB: Need a sweet fix without cranking up the oven? We’ve got you covered! Check out our guide to Perfect Peanut Butter Balls: Easy No-Bake Treats for a ridiculously easy recipe that’s perfect for whipping up in a flash – no baking skills required!
Get Creative with Your Peanut Butter Balls
The beauty of peanut butter balls lies in their versatility. Let’s unleash your inner pastry chef and explore some exciting flavor combinations and mix-in options!

Chocolate Dipped Dreams
Transform your classic peanut butter balls into decadent treats with a touch of chocolate!
- Melt the Magic: Melt your chocolate of choice (semisweet, dark, milk, or white chocolate chips, candy melts, or chopped chocolate) in a double boiler or heatproof bowl over simmering water, stirring frequently until smooth.
- Chocolate Paradise: Once the peanut butter balls are chilled and firm, use a fork or spoon to dip each ball into the melted chocolate, coating it completely. Tap gently to remove excess chocolate and allow any remaining chocolate to drip off.
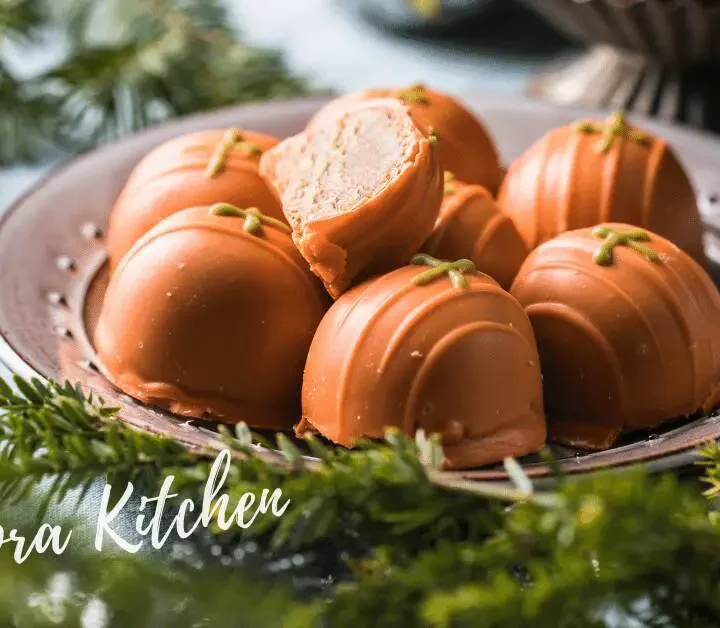
- Decorate & Display: Place the chocolate-dipped peanut butter balls on a parchment paper-lined baking sheet. Get creative! Decorate with sprinkles, chopped nuts, shredded coconut, or drizzles of melted chocolate before letting them set completely.
Optional: Tempering the Chocolate
For an extra-smooth and professional-looking chocolate coating, consider tempering your chocolate. While not essential, tempering creates a glossy finish and a satisfying snap when bitten into .
Table 2: Dipping Chocolate Options
| Chocolate Type | Melting Tips |
|---|---|
| Semisweet Chocolate Chips | Easy to melt, versatile flavor |
| Dark Chocolate Chips | Richer flavor, higher cocoa content |
| Milk Chocolate Chips | Sweeter flavor, good for families |
| White Chocolate Chips | Sweet and creamy, pairs well with fruits |
| Candy Melts | Easy to use, come in various colors |
| Chopped Chocolate | More challenging to melt, requires careful attention |
Cereal Surprise
Add a delightful textural contrast to your peanut butter balls with the delightful crunch of cereal!
- Cereal Choices: Explore a variety of cereals to find your perfect match. Crushed rice krispies, chopped peanuts, chopped almonds, or even granola can add exciting textures and flavors .
- Cereal Incorporation: After mixing the peanut butter mixture and before rolling into balls, gently fold in your chosen cereal pieces until evenly distributed
Fruity Fun
For a burst of fruity sweetness, consider incorporating dried fruits into your peanut butter balls!
- Fruity Delights: Dried cranberries, chopped cherries, chopped dried apricots, or raisins can add a delightful pop of flavor and chewy texture.
- Fruity Integration: Similar to adding cereal, fold in your chosen chopped dried fruits after mixing the peanut butter mixture but before shaping them into balls .
Oatmeal Delight
Seeking a more health-conscious twist on your peanut butter balls? Look no further than the power of oats!
- Oats for Energy: Rolled oats add a delightful texture and a boost of fiber to your peanut butter balls.
- Oatmeal Magic: After mixing the peanut butter mixture, fold in rolled oats until just combined.
Table 3: Fun Mix-In Ideas for Peanut Butter Balls
| Mix-In Category | Examples |
|---|---|
| Cereals | Rice Krispies, chopped nuts, granola |
| Dried Fruits | Cranberries, cherries, apricots, raisins |
| Chocolate | Chocolate chips, chopped chocolate bars, cocoa powder |
| Spices | Cinnamon, nutmeg, ginger |
| Seeds | Chia seeds, flax seeds, hemp seeds |
| Coconut | Shredded coconut, coconut flakes |
| Candy | Chopped candy bars, M&Ms (use after dipping in chocolate) |
Remember: When adding mix-ins, be mindful of the overall consistency of your peanut butter mixture. Start with a smaller amount and gradually add more until you reach your desired texture.
Pro Tips & Troubleshooting
Now that you’re armed with a treasure trove of creative ideas, let’s delve into some helpful tips and solutions to ensure your peanut butter ball endeavors are nothing short of delightful!
Here are some pro tips to make sure your peanut butter balls are awesome!
- Sticky Situation: If your peanut butter mixture feels too sticky and difficult to handle, there are a few solutions. First, try chilling the mixture for an additional 15-20 minutes. The cold temperature will help firm it up . If the mixture remains sticky after chilling, add a small amount of powdered sugar, one tablespoon at a time, until it reaches a workable consistency .
- Crumbly Conundrum: On the other hand, if your peanut butter mixture is too dry and crumbly, it won’t hold its shape well when rolled into balls. The solution here is to add a little moisture. Start with a teaspoon of milk or melted butter, and mix it in until the mixture comes together. If needed, add another teaspoon at a time until you reach the desired consistency.
- Chilling is Key: Don’t skip the chilling step! Chilling the peanut butter balls allows them to firm up and set, making them easier to handle and dip in chocolate
- Storage Solutions: Store your peanut butter balls in an airtight container in the refrigerator for up to 2 weeks, or in the freezer for up to 3 months.
Allergy-Friendly Fun
No worries, peanut allergies don’t have to stop the fun! Here are some substitutions you can make to create delicious and allergy-friendly peanut butter balls:
- Nut Butter Alternatives: Explore alternative nut butters like almond butter, sunflower seed butter, or cashew butter. These options offer a similar creamy texture and delicious flavor profile.
- Dairy-Free Delights: For those with dairy allergies, opt for vegan chocolate chips or candy melts when dipping your peanut butter balls. You can also use dairy-free butter alternatives in the base recipe.
The Science Behind the Perfect Peanut Butter Ball
So, what’s the science behind these delicious bites? Understanding the role of the ingredients can help you achieve perfect peanut butter balls every time!
The Fat Factor: Peanut butter plays a crucial role in binding the ingredients together. The fat content in peanut butter acts like a glue, holding everything together and creating a smooth and cohesive mixture Next, Sugar Sweet Science: Powdered sugar serves a dual purpose. First, it adds sweetness to the peanut butter balls, balancing out the richness of the peanut butter. Second, the powdered sugar helps absorb some of the moisture from the peanut butter, creating a drier and more manageable mixture.
Building on this Chilling Magic: Chilling the dough is key for easy shaping! The cold temperature helps solidify the fat in the peanut butter, making it easier to roll the mixture into balls without it sticking to your hands. By understanding these scientific principles, you can adjust your recipe and techniques to achieve the perfect peanut butter ball texture every time!


